
Configure the Profile Container Registry Settings – Implement and Manage FSLogix
Configure the Profile Container Registry Settings
The profile container can be enabled through the registry settings and FSLogix user groups. As you have learned, the registry settings may be managed manually inside the image or manually on each session host or with GPOs, and you can make the decision based on your requirements. It is always recommended to automate the profile registry
by GPO or image creation to avoid typing mistakes. The configuration settings for the profile container are set in HKLM\SOFTWARE\FSLogix\Profiles on each VM inside the same host pool.
The settings in Table 6-1 are required to enable the profile container and to specify the location for the profile VHD to be stored.
Table 6-1. FSLogix User Profile Container Registry Setting

Adding a Profile Container Registry Key
Follow these steps:
\ 1.\ You have to get the Azure file share path from the storage account we created for the user profile before you add the registry key. Let’s go to the user profile storage account and click “+File share.” See Figure 6-22.
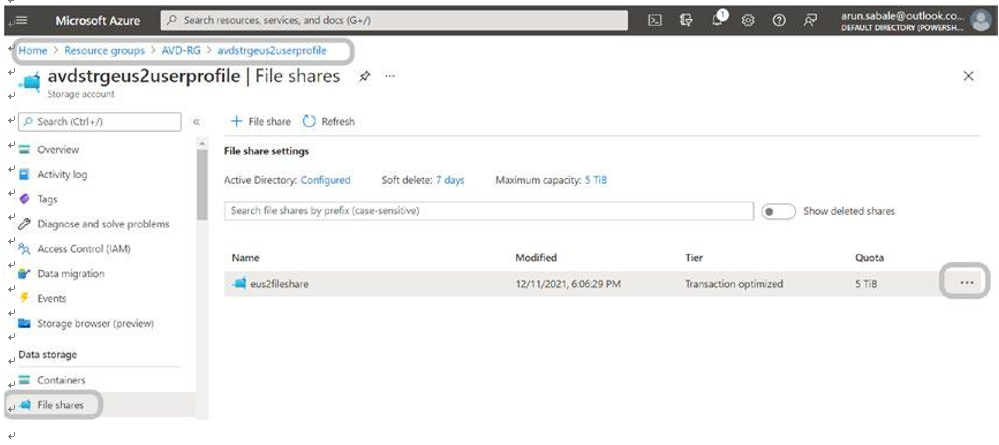
Figure 6-22. FSLogix container registry, getting the storage file share
\ 2.\ Click the three dots in front of the file share and click Connect. See Figure 6-23.
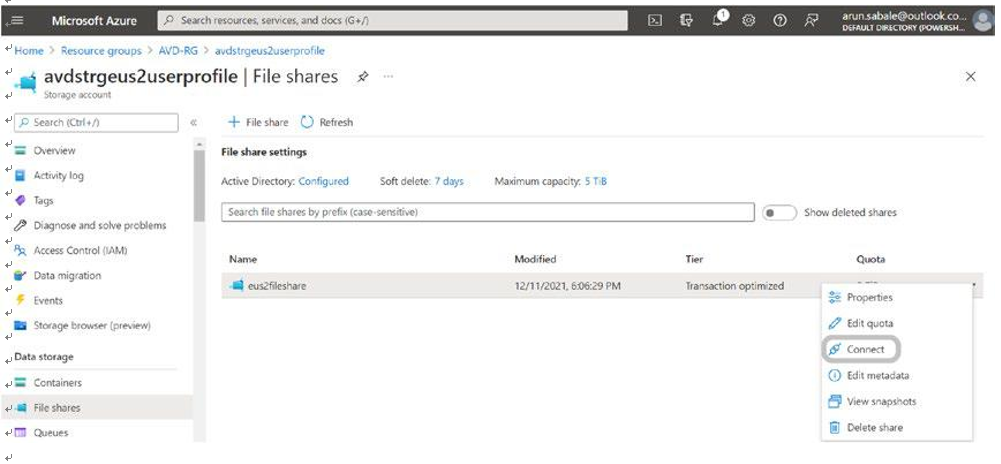
Figure 6-23. FSLogix container registry, getting the storage file share, step 2
\ 3.\ Copy the storage account path from the Connect pop-up, as shown in Figure 6-24.
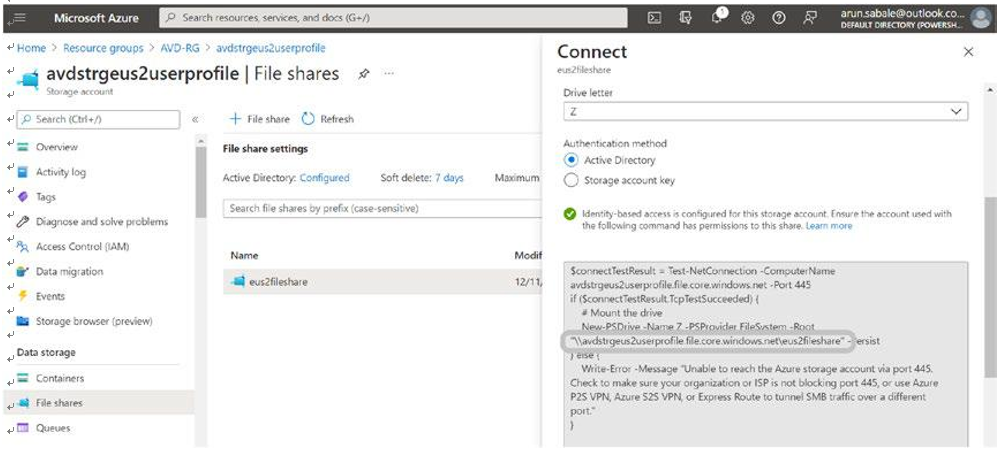
Figure 6-24. FSLogix container registry, getting the storage file share, step 3
\ 4.\ Now log in to the image VM using Bastion and open the registry with the Administrator context (Run as Administrator). Browse the registry path HKLM\SOFTWARE\Fslogix\Profiles and create both registry keys mentioned in Table 6-2. See Figure 6-25.
Table 6-2. VHDLocation Registry Key

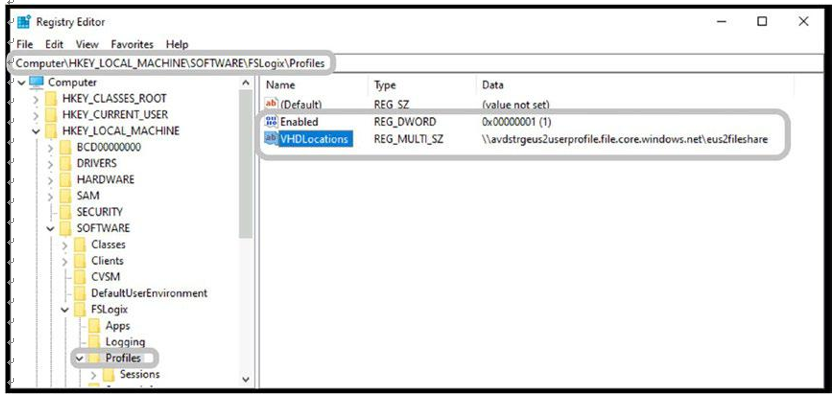
Figure 6-25. FSLogix container registry, VHDlocation registry key
\ 5.\ You can also look at additional registry keys in Table 6-3 and add them in case you want them based on the organization requirements.