
Creating a Golden Image – Create and Manage Session Host Images
Creating a Golden Image
A golden image is a custom operating system image with all the applications and software installed and configured so that you can create a VM with the image. A golden image is like a preconfigured template for a VM; it saves you time installing and configuring applications on all the VMs after their creation, and it reduces errors and adds consistency across all the VMs.
Let’s see how to create a golden image and what other automation options we have that can automate the image creation. See Figure 7-1.

Figure 7-1. Golden image creation steps/process
The golden image creation process is simple: you can pick an image from the Azure marketplace or use an existing golden image from a shared image gallery and create the VM. You can connect the image VM with Bastion so that you can do all the customization including installing and configuring the applications. Also, you can configure all the compliance policies and settings on the image VM. Once you are done with all the customizations, then the next step is to generalize the VM and capture the image.
Generalizing and Capturing a VM Image
Generalizing a VM is nothing more than running the sysprep command to remove all personal account information and prepare the machine to be used as an image. The following are the steps to generalize the VM:
\ 1.\ Connect to the image virtual machine.
\ 2.\ Open the Command Prompt window as Administrator. Change the directory to %windir%\system32\sysprep, and then run sysprep.exe.
\ 3.\ In the System Preparation Tool dialog box, select Enter System Out-of-Box Experience (OOBE), and make sure that the Generalize checkbox is selected. In Shutdown Options, select Shutdown and then click OK.
\ 4.\ When Sysprep completes, it will shut down the virtual machine. Do not start/restart the VM. See Figure 7-2.

Figure 7-2. Sysprep to generalize image
\ 5.\ The VM needs to be deallocated and marked as generalized in Azure. Use the Stop-AzVM PowerShell command to deallocate the VM.
\ 6.\ Start PowerShell, log in to the Azure subscription, and make sure the correct subscription is selected. Here is the code:
########################################################################### # Modify below parameter
$resourceGroup = <myResourceGroup>
$VMName= <myVM-name>
$subscriptionID= <subscription-ID>
###########################################################################
Connect-AzAccount
Select-AzSubscription $subscriptionID
Stop-AzVM -ResourceGroupName $resourceGroup -Name $VMName -Force
Set-AzVM -ResourceGroupName $resourceGroup -Name $VMName -Generalized
\ 7.\ Now you can go back to the Azure portal and select the image from the virtual machines listed.
\ 8.\ Check the virtual machine status.
\ 9.\ On the “Virtual machine” page for the VM, on the upper menu, select Capture.
\ 10.\ Enter all the details and select “Yes, share it to a gallery as a VM image version” on the “Create an image” page, and click “Review + create.” See Figure 7-3.
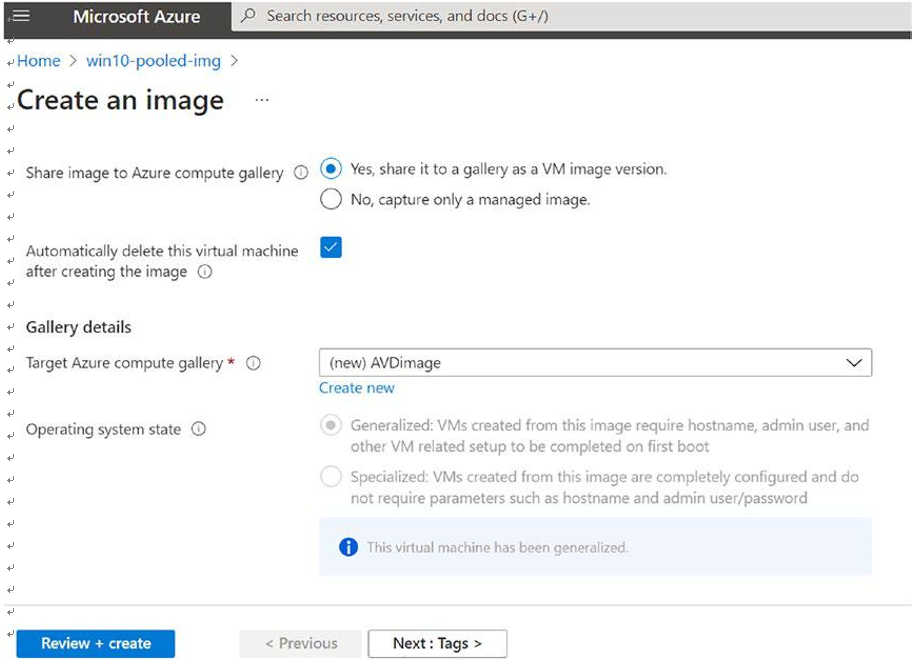
Figure 7-3. Creating an image
\ 11.\ Select image replication if you want to replicate the image to another region and click the “Review + create” button. See Figure 7-4.
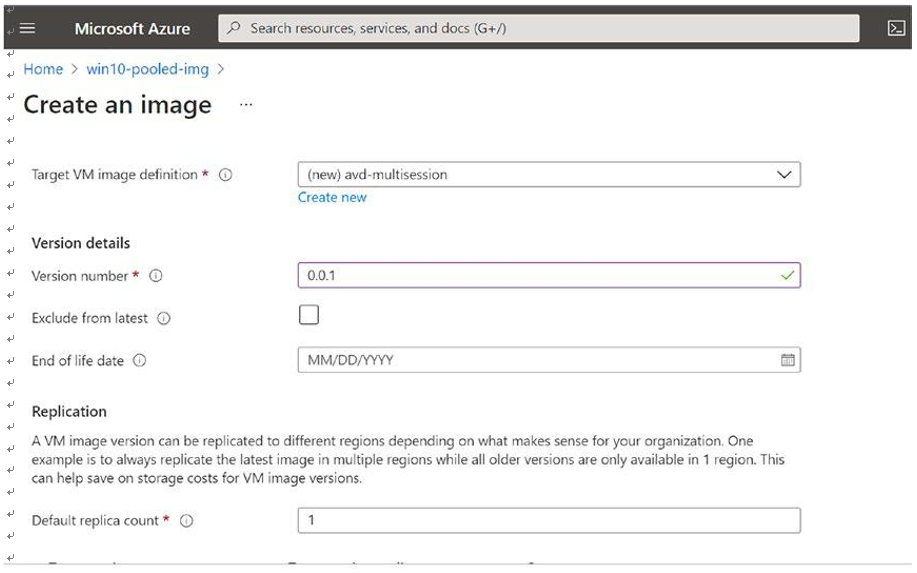
Figure 7-4. Creating an image, step 2
Once the image is created, you will be able to see the image in the shared image gallery. See Figure 7-5.
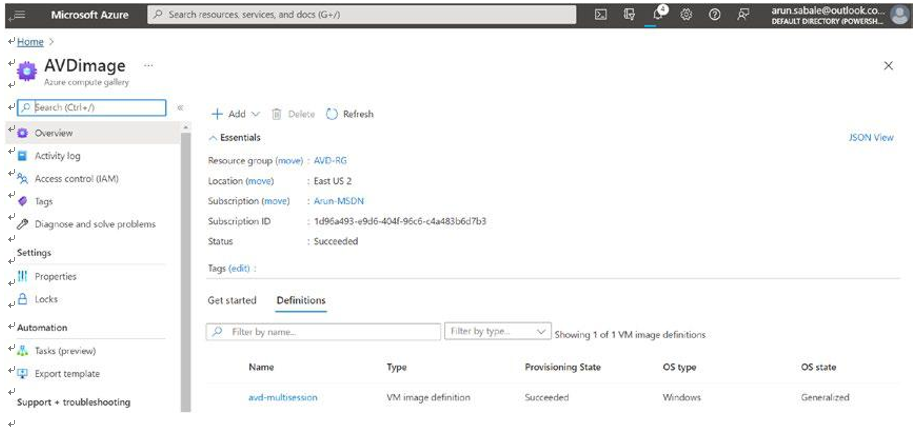
Figure 7-5. Creating an image, image gallery