
Pooled Host Pool Creation Using the Azure Portal – Create and Configure Host Pools and Session Hosts
Pooled Host Pool Creation Using the Azure Portal
Follow these steps:
\ 1.\ Log in to portal.azure.com with an appropriate account. The login account should have contributor permission or an equivalent permission so that you can create virtual desktop resources in Azure.
\ 2.\ Use the top search box to navigate to Azure Virtual Desktop.
\ 3.\ On the Azure Virtual Desktop page, Click the “Create a host pool” button to get started. See Figure 8-8.
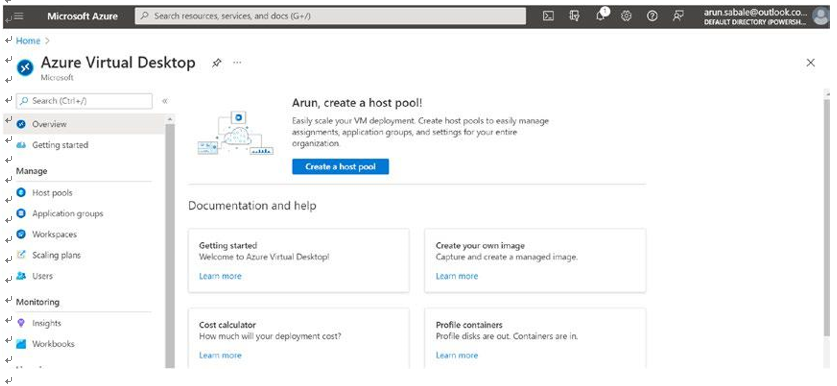
Figure 8-8. Azure Virtual Desktop, pooled host pool creation
\ 4.\ On the Basics tab you will enter common details such as a resource group, a host pool name, and the location. Set the host pool type to Pooled and the load balancing type to Depth first or Breadth first, based on your requirements.
•\ Pooled session load balancing algorithm: Session host load balancing is achieved by either the depth-first or breadth-first algorithm. The broker decides how new incoming sessions are to be distributed across the VMs in a host pool.
•\ Breadth-first: This is the default configuration for new nonpersistent host pools. It distributes new user sessions across all available session hosts in the host pool. When you configure the breadth-first load balancing, you may set a maximum session limit per session host in the host pool.
•\ Depth-first: This distributes new user sessions to an available session host with the highest number of connections, but that has not reached its maximum session limit threshold. When you configure the depth-first load balancing, you must set a maximum session limit per session host in the host pool.
•\ Max session limit: This is the maximum number of users who have concurrent sessions on a session host. When setting a host pool to have depth-first load balancing or when you’re planning to use autoscaling, you must set an appropriate max session limit according to the configuration of your deployment and capacity of your VMs. It is important to calculate the max session limit per session host properly to avoid performance issues in production (refer to Chapter 2 for more details).
Table 8-1 shows an example of the maximum users per vCPU.
Table 8-1. Azure Virtual Desktop Usage Profile
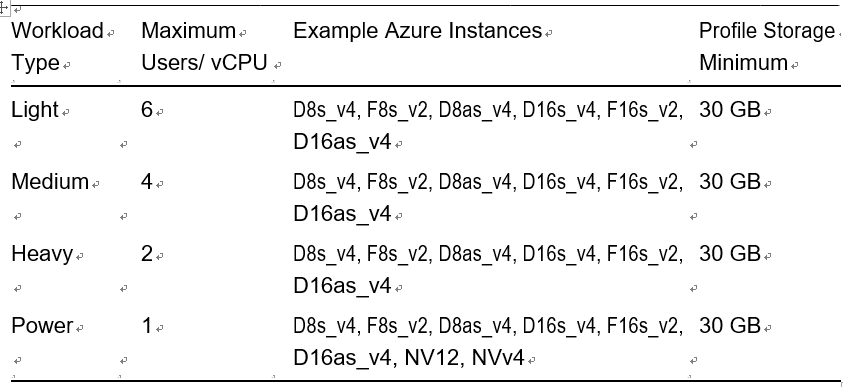
It is always recommended to consider application/software recommendations and operating system requirements while deciding the usage profile for the pooled desktop.
Click the Next button and go to the Virtual Machines tab. See Figure 8-9.
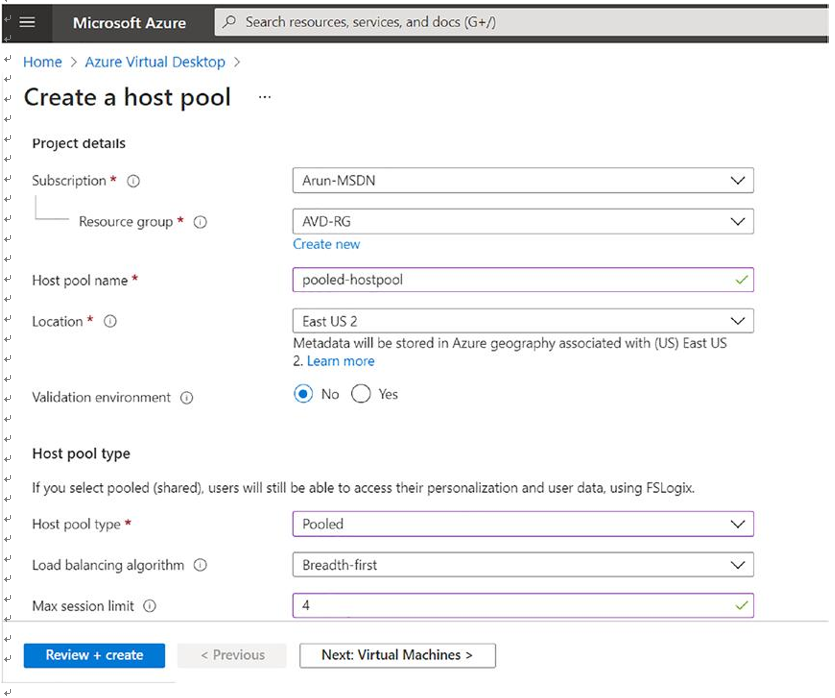
Figure 8-9. Azure Virtual Desktop pooled hostpool creation, step 1
\ 5.\ On the Virtual Machines tab, you can a create session host or you can add a session host after the host pool creation. If you select to create a virtual machine, then enter all the required details for the virtual machine, as shown here:
•\ Name prefix: This will be the prefix for the VM in the host pool, and a suffix will be added by Azure Virtual Desktop at the end of the name.
•\ VM Location: You can choose a different region for virtual machines than the host pool, especially if you want metadata to be stored in a particular geography, but you want the virtual machines closer to the user.
•\ Availability zone: Azure offers a range of options for managing the availability and resiliency of your applications. Architect your solution to use replicated virtual machines in availability zones or availability sets to protect your apps and data from data center outages and maintenance events. See Figure 8-10.
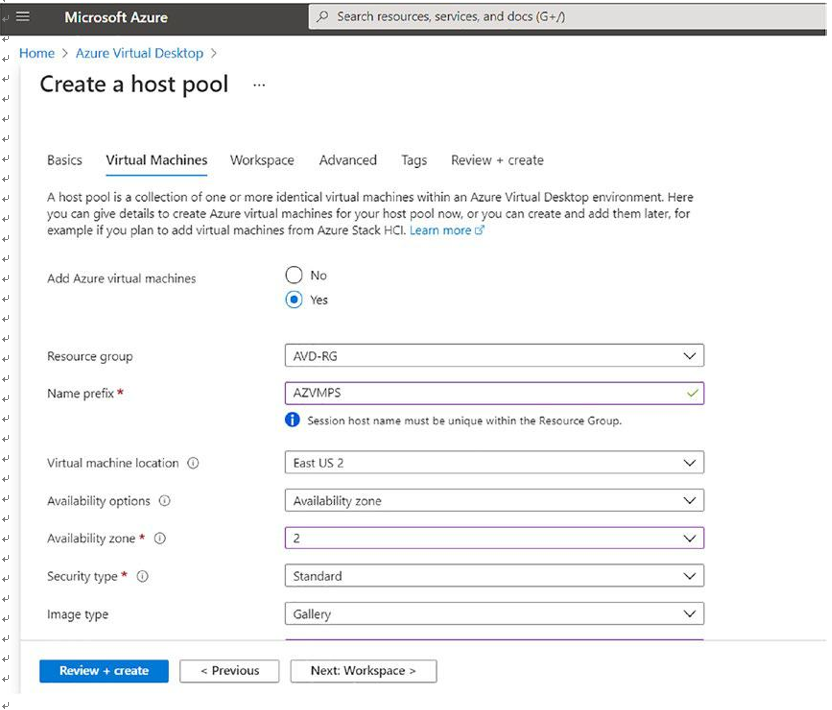
Figure 8-10. Azure Virtual Desktop pooled hostpool creation, Virtual Machines tab
Image and size: You can select the size and multisession image based on the assessment and your organization requirement (refer to Chapter 2).
VNet and security: Select the existing virtual network you created in an earlier chapter (refer to Chapter 4 for details). See Figure 8-11.
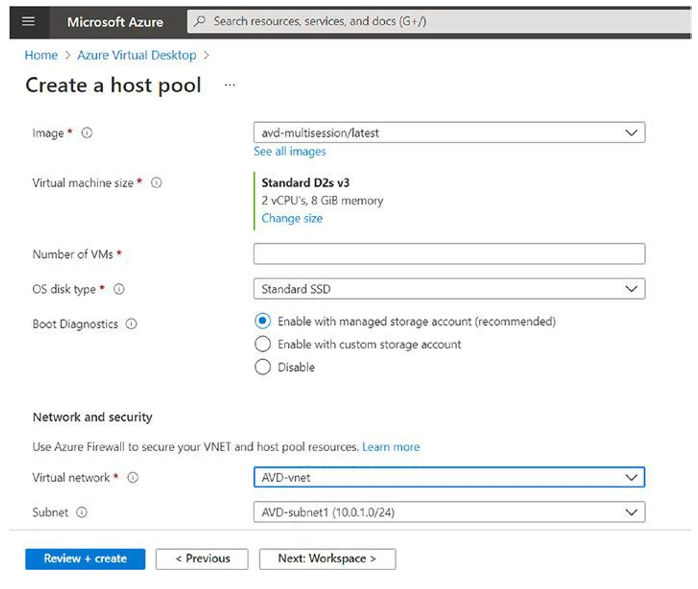
Figure 8-11. Azure Virtual Desktop, pooled hostpool creation, VM size and network tab
Domain join: You can select Active Directory (on-premises) and enter the domain join OU and credentials. If you select Azure Active Directory, then you may not be prompted for credentials. See Figure 8-12.
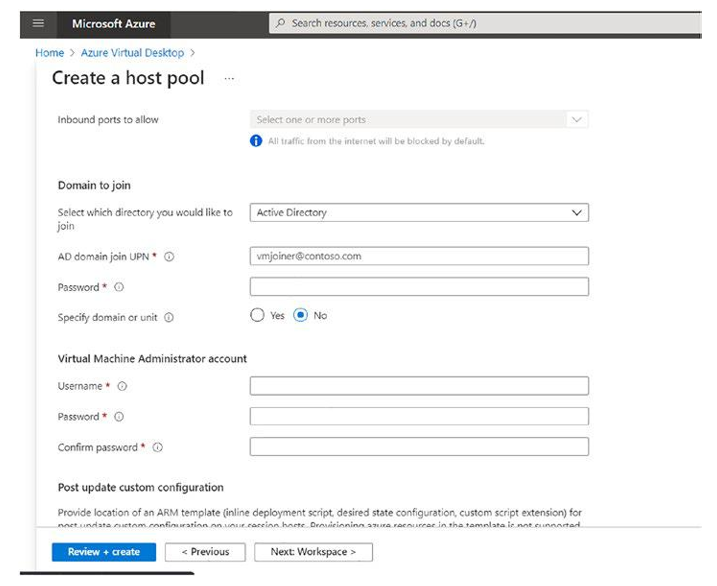
Figure 8-12. Azure Virtual Desktop, pooled hostpool creation, Domain join tab
\ 6.\ Click the Next button and go to the Workspace tab on which you select the existing workspace or create a new one for the host pool. See Figure 8-13.
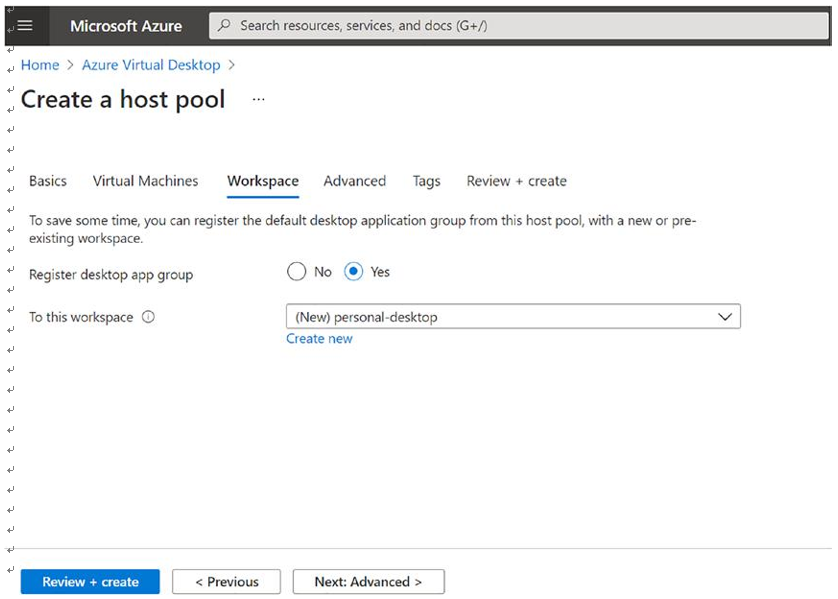
Figure 8-13. Azure Virtual Desktop pooled hostpool creation, Workspace tab
\ 7.\ The next tab is Advanced, where you can define the Azure Virtual Desktop diagnostic log location; you can store diagnostic logs in log analytics, a storage account, and an event hub. The diagnostic log contains all the connection information such as successful connections, failed connections, and AVD host pool health, so it is recommended to enable the diagnostic logs. If you are planning to create an Azure dashboard for AVD, you can use the log analytics to store all the diagnostic logs. See Figure 8-14.
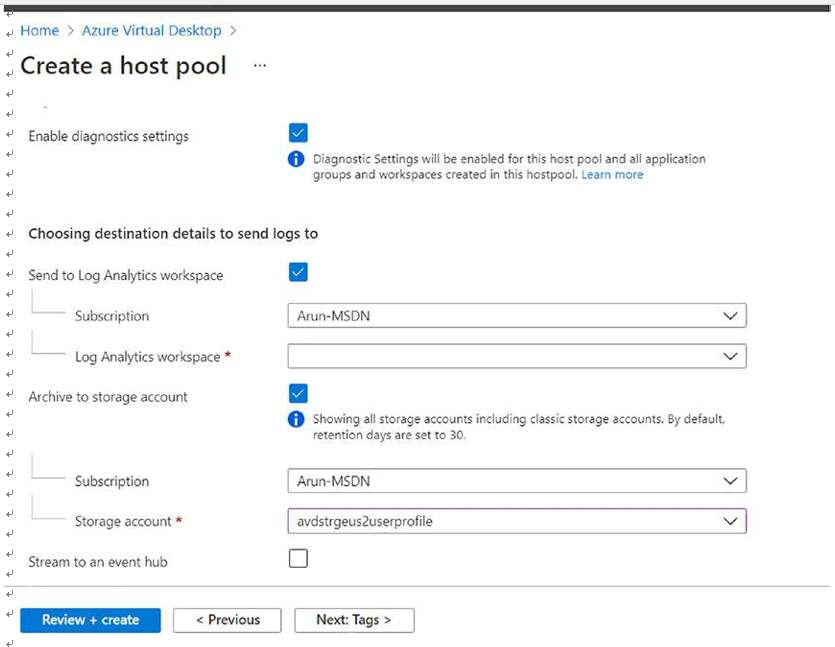
Figure 8-14. Azure Virtual Desktop pooled hostpool creation, diagnostics
\ 8.\ Click the “Review + create” button and then the Create button to create your host pool. See Figure 8-15.